Garmin iQue 3600a User Manual
Browse online or download User Manual for Air equipment Garmin iQue 3600a. Garmin iQue 3600a User Manual
- Page / 124
- Table of contents
- BOOKMARKS
- Limited Warranty 4
- ESD Caution 5
- Warnings 5
- Table of Contents 6
- HANDHELD 11
- Locating Front Panel Controls 12
- Introduction: iQue Components 13
- Using the Stylus 14
- Brightness Adjustment Slider 15
- Resetting Your iQue 16
- Opening Applications 17
- Using the Handheld Interface 18
- Using Menus and Menu Commands 19
- Displaying Tips 19
- Customizing Your Handheld 20
- To set the date: 21
- To set the time: 21
- Set Time Zone screen 22
- Selecting a Color Theme 25
- Palm™ Desktop Software 26
- Using the On-Screen Keyboard 27
- Entering Data Using Graffiti 28
- 2 Handwriting Software 28
- 2 Writing 29
- Blinking cursor 30
- Start stroke at heavy dot 30
- Lift stylus here 30
- The Graffiti 31
- 2 Alphabet 31
- Writing Capital Letters 31
- Writing Numbers 31
- Writing Accent Marks 32
- Using Graffiti 33
- 2 Gestures 33
- 2 ShortCuts 33
- To create a ShortCut: 34
- To edit a ShortCut: 34
- To delete a ShortCut: 34
- Using Your Computer Keyboard 35
- Importing Data 36
- Using An External Keyboard 36
- Selecting Applications 37
- Categorizing Applications 38
- To change the HotSync 40
- buttons preferences: 40
- Removing Applications 42
- Assigning Security Options 43
- Locking Your Handheld 45
- Using the Date Book 46
- Scheduling Events 47
- Scheduling Untimed Events 49
- Tap the 50
- Repeat box 50
- Tap Delete 51
- Rescheduling Events 52
- Setting Alarms 53
- Setting Alarm Options 54
- Changing the Date Book View 55
- Working in Week View 56
- Tips for Using Week View 57
- Spotting Event Conflicts 57
- Working in Month View 58
- Tips for Using Month View 58
- Working in Agenda View 58
- Tips for Using Agenda View 59
- Using the To Do List 61
- Creating To Do List Items 62
- Setting To Do List Priorities 63
- Tap here 64
- Using the Address Book 66
- Duplicating an Entry 68
- Editing Address Book Entries 69
- Using the Memo Pad 71
- Reviewing Memos 72
- Using the Calculator 73
- Using the Que Applications 74
- Creating Records 75
- Editing Records 75
- Deleting Records 76
- Purging Records 77
- Categorizing Records 77
- To rename a category: 79
- Finding Records 80
- Using Phone Lookup 81
- Sorting Records 82
- Making Records Private 83
- To hide private records: 84
- To display private records: 84
- Attaching Notes 85
- Choosing Fonts 86
- Insistent Alarms 87
- Setting Alarm Volume 88
- Setting Alarm Sound Effects 88
- Subtle Alarms 90
- Displaying Contents of a Card 91
- Using Card Info 95
- About Card Info 96
- Beaming a Record 97
- Beaming a Business Card 97
- Beaming an Application 98
- Receiving Beamed Information 98
- Turning Off Beaming 98
- OPERATIONS 99
- Creating a User Profile 100
- Selecting HotSync 101
- Setup Options 101
- Customizing HotSync 102
- Application Settings 102
- IR HotSync Operations 103
- Performing an IR HotSync 105
- Operation 105
- Operations 105
- Conducting a HotSync 106
- Operation Via a Modem 106
- Preparing Your Handheld 107
- Operation Via a Network 109
- Using File Link 110
- Connection Preferences 111
- Setting Modem Configurations 112
- Network Preferences 113
- Customizing Service Templates 114
- To edit a service template: 115
- To delete a service template: 115
- Creating a Login Script 117
Summary of Contents
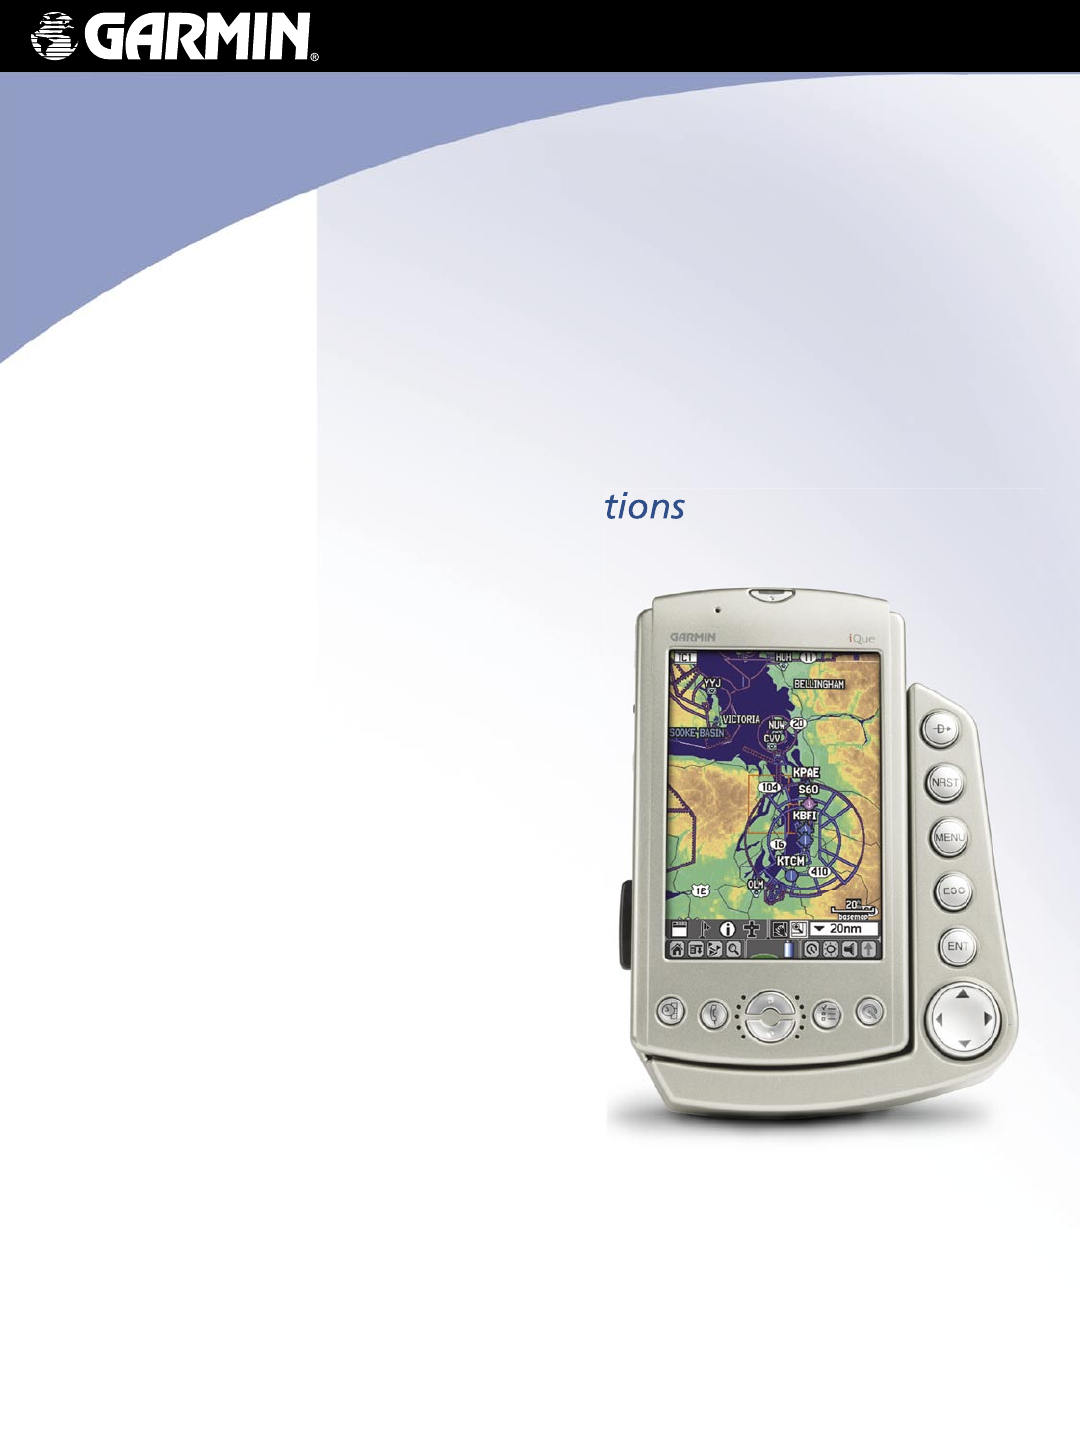
iQue® 3600aintegrated handheldoperating instructionsoperating instructions
Introduction: Table of ContentsxCustomizing Service Templates ...
9.2Chapter 9 Using HotSync® OperationsHotSync® Operations: Performing a HotSync Operation for the First TimeCreating a User ProfileYou can create a use
9.3HotSync® Operations: Performing a HotSync Operation for the First TimeChapter 9 Using HotSync® OperationsSelecting HotSync® Setup OptionsYou can ch
9.4Chapter 9 Using HotSync® OperationsHotSync® Operations: Performing a HotSync Operation for the First TimeCustomizing HotSync® Application SettingsF
9.5HotSync® Operations: IR HotSync OperationsChapter 9 Using HotSync® Operations5. Click to select the way you want to transfer data, or click Do Not
9.6Chapter 9 Using HotSync® OperationsHotSync® Operations: IR HotSync OperationsTo determine the ports used for infrared communication:1. On the Wind
9.7HotSync® Operations: IR HotSync OperationsChapter 9 Using HotSync® OperationsPerforming an IR HotSync® OperationAfter you complete the steps to pre
9.8Chapter 9 Using HotSync® OperationsHotSync® Operations: Conducting a HotSync Operation Via a ModemConducting a HotSync® Operation Via a ModemYou ca
9.9HotSync® Operations: Conducting a HotSync Operation Via a ModemChapter 9 Using HotSync® Operations3. Adjust the following options as needed: • Se
9.10Chapter 9 Using HotSync® OperationsHotSync® Operations: Conducting a HotSync Operation Via a ModemSelecting Conduits for a Modem HotSync Operation
9.11HotSync® Operations: Conducting a HotSync Operation Via a NetworkChapter 9 Using HotSync® OperationsConducting a HotSync® Operation Via a NetworkW
Introduction: System Requirements1.1Chapter 1 IntroductionCHAPTER 1: INTRODUCTION TO THE IQUE® HANDHELDWith your iQue handheld, you can successfully
9.12Chapter 9 Using HotSync® OperationsHotSync® Operations: Using File LinkTo prepare your device for a network HotSync® operation:1. Tap the Applica
Chapter 10 Setting Connection and Network Preferences10.1Setting Connection and Network Preferences: Connection PreferencesCHAPTER 10: SETTING CONNECT
Chapter 10 Setting Connection and Network Preferences10.2Setting Connection and Network Preferences: Connection PreferencesSetting Modem Configurations
Chapter 10 Setting Connection and Network Preferences10.3Setting Connection and Network Preferences: Network PreferencesNetwork PreferencesYou must se
Chapter 10 Setting Connection and Network Preferences10.4Setting Connection and Network Preferences: Network Preferences7. Tap the Connection pick
Chapter 10 Setting Connection and Network Preferences10.5Setting Connection and Network Preferences: Network PreferencesTo edit a service template: 1.
Chapter 10 Setting Connection and Network Preferences10.6Setting Connection and Network Preferences: Network PreferencesEntering DNS Numbers and IP Ad
Chapter 10 Setting Connection and Network Preferences10.7Setting Connection and Network Preferences: Network PreferencesCreating a Login ScriptA login
Chapter 10 Setting Connection and Network Preferences10.8Setting Connection and Network Preferences: Network PreferencesUsing Non-ASCII Characters in
Chapter 10 Setting Connection and Network Preferences10.9Setting Connection and Network Preferences: Network PreferencesTroubleshooting TCP/IP Connect
Introduction: iQue Components1.2Chapter 1 IntroductioniQue ComponentsPower/Backlight ButtonBattery IconiQue ScreenText Input AreaApplication ButtonsSc
10.10IndexIndexAAC Charger Connector 1.3Add-On ApplicationsInstalling 3.5–3.6Removing 3.6Address Book 4.21–4.25Creating an Entry 4.22–4.23Display
10.11IndexIndexDisplay Options 4.14–4.15Month View 4.13–4.14Opening 4.1Repeating or Continuous Events 4.5–4.7Scheduling Events 4.2–4.7Setting Ala
10.12IndexIndexInstalling Palm Desktop Software 1.16Interface Connector 1.3International Keyboard 2.1–2.2IP Addresses 10.6–10.7iQue Components 1.
10.13IndexIndexScroll Buttons 1.2SD Card 7.1–7.6Security Options 3.7–3.9Service Templates 10.4–10.5Setting Alarms 4.8–4.10Setting Daylight Saving
© Copyright 2004 Garmin Ltd. or its subsidiariesGarmin International, Inc. 1200 E. 151st Street, Olathe, KS 66062, U.S.A.Garmin (Europe) Ltd. Unit 5,
Introduction: iQue Components1.3Chapter 1 IntroductionLeft Side ViewREC ButtonThumb WheelESC ButtonTop ViewStylusExternal Antenna ConnectorIR PortHe
Introduction: Using the Stylus1.4Chapter 1 IntroductionReset ButtonBack Side ViewFlip-up GPS Antenna (open parallel to the horizon for GPS navigation
Introduction: Starting Your Handheld and Calibrating the Screen1.5Chapter 1 IntroductionStarting Your Handheld and Calibrating the ScreenThe first time
Introduction: Resetting Your iQue1.6Chapter 1 IntroductionResetting Your iQueYou may need to perform a reset if your handheld no longer responds to st
Introduction: Opening Applications1.7Chapter 1 IntroductionOpening ApplicationsYou can use the Applications Launcher to open any application installed
Introduction: Using the Handheld Interface1.8Chapter 1 IntroductionUsing the Handheld InterfaceIconsA Dot1 DotScroll BarPick ListTap the tab to view t
Introduction: Using the Handheld Interface1.9Chapter 1 IntroductionUsing Menus and Menu CommandsMenus on your handheld are easy to use and work the sa
ii© Copyright 2004 PalmSource and Garmin Ltd. or its subsidiaries. All Rights Reserved.Palm OS, the Palm logo, PalmSource, Graffiti, HotSync, Palm, Pal
Introduction: Customizing Your Handheld1.10Chapter 1 IntroductionCustomizing Your HandheldYou can customize your handheld to do the following:• Displ
Introduction: Customizing Your Handheld1.11Chapter 1 IntroductionSetting the Date, Time, and Time ZoneThe Date & Time screen allows you to set the
Introduction: Customizing Your Handheld1.12Chapter 1 Introduction NOTE: To display time based on a 24-hour clock, change the time format. See “Format
Introduction: Customizing Your Handheld1.13Chapter 1 IntroductionFormatting the Date, Time and NumbersThe Formats Preferences screen allows you to set
Introduction: Customizing Your Handheld1.14Chapter 1 IntroductionSetting the Auto-Off Delay TimeYou can set your handheld to shut off automatically af
Introduction: Customizing Your Handheld1.15Chapter 1 IntroductionSetting the Sounds and VolumesYou can control the sound for system alerts, alarms, an
Introduction: Palm™ Desktop Software1.16Chapter 1 IntroductionPalm™ Desktop SoftwarePalm Desktop software includes the same main applications as your
Chapter 2 Entering Data2.1Entering Data: Using the On-Screen KeyboardCHAPTER 2: ENTERING DATA IN YOUR IQUE HANDHELDYou can enter data into your iQue h
Chapter 2 Entering Data2.2Entering Data: Entering Data Using Graffi ti® 2Entering Data Using Graffiti® 2 Handwriting SoftwareYou can use Graffiti 2 strok
Chapter 2 Entering Data2.3Entering Data: Entering Data Using Graffi ti® 2General Guidelines for Graffiti® 2 WritingFollow these guidelines to learn and
iii5. LIMITATION OF WARRANTIES AND LIABILITY: THE PRODUCT IS PROVIDED ON AN “AS IS” BASIS, WITHOUT ANY WARRANTIES OR CONDITIONS, EXPRESS OR IMPLIED,
Chapter 2 Entering Data2.4Entering Data: Entering Data Using Graffi ti® 2To write Graffiti® 2 letters:1. Tap the screen where you want to write text (f
Chapter 2 Entering Data2.5Entering Data: Entering Data Using Graffi ti® 2The Graffiti® 2 AlphabetDraw Graffiti 2 letters according to the following alpha
Chapter 2 Entering Data2.6Entering Data: Entering Data Using Graffi ti® 2Writing Accent MarksWhen writing letters with accent marks, first write the let
Chapter 2 Entering Data2.7Entering Data: Entering Data Using Graffi ti® 2Using Graffiti® 2 GesturesGestures are editing commands, such as cut, copy, and
Chapter 2 Entering Data2.8Entering Data: Entering Data Using Graffi ti® 2To create a ShortCut:1. Tap the Home icon. Then tap the Prefs icon .2. Ta
Chapter 2 Entering Data2.9Entering Data: Using Your Computer KeyboardUsing the Graffiti® 2 TunerThe Graffiti 2 tuner allows you to use alternate strokes
Chapter 2 Entering Data2.10Entering Data: Importing DataImporting DataIf you have data stored in computer applications such as spreadsheets and databa
3.1Managing Applications: Using the Applications LauncherChapter 3 Managing ApplicationsCHAPTER 3: MANAGING APPLICATIONSThis chapter explains how to s
3.2Managing Applications: Using the Applications LauncherChapter 3 Managing ApplicationsCategorizing ApplicationsCategories can help you manage the nu
3.3Managing Applications: Using the Applications LauncherChapter 3 Managing Applications In addition to displaying applications by icon or list, you c
Introduction: Limited WarrantyivLimited WarrantyThe iQue® 3600a is warranted to be free from defects in materials or workmanship for one year from the
3.4Managing Applications: Using the Applications LauncherChapter 3 Managing ApplicationsTo change the HotSync® buttons preferences:1. Tap the Home ic
3.5Managing Applications: Installing Add-On ApplicationsChapter 3 Managing ApplicationsInstalling Add-On ApplicationsIn addition to the applications t
3.6Managing Applications: Installing Add-On ApplicationsChapter 3 Managing Applications TIP: You can also select the Install Tool dialog box by doubl
3.7Managing Applications: Assigning Security OptionsChapter 3 Managing ApplicationsRemoving Palm™ Desktop SoftwareIf you no longer want to use Palm De
3.8Managing Applications: Assigning Security OptionsChapter 3 Managing Applications4. Open one of the basic applications and view a record. Records m
3.9Managing Applications: Assigning Security OptionsChapter 3 Managing ApplicationsLocking Your HandheldYou can turn off and lock your handheld with a
Chapter 4 Using Basic Applications4.1Basic Applications Overview: Using the Date BookCHAPTER 4: USING BASIC APPLICATIONSYour iQue Palm OS® handheld wi
Chapter 4 Using Basic Applications4.2Basic Applications Overview: Scheduling EventsScheduling EventsAn entry in the Date Book is called an event. When
Chapter 4 Using Basic Applications4.3Basic Applications Overview: Scheduling EventsTap the time to display the Set Time dialog box.4. Set the dura
Chapter 4 Using Basic Applications4.4Basic Applications Overview: Scheduling EventsTo schedule a timed event for another date:1. Select the date you
Introduction: Information, Cautions, and WarningsvLithium-Ion Battery InformationYour iQue 3600a contains a non-user-serviceable lithium-ion battery.
Chapter 4 Using Basic Applications4.5Basic Applications Overview: Scheduling EventsScheduling Repeating or Continuous EventsThe Repeat function lets y
Chapter 4 Using Basic Applications4.6Basic Applications Overview: Scheduling EventsChanging Repeating or Continuous EventsWhen you make changes to a r
Chapter 4 Using Basic Applications4.7Basic Applications Overview: Scheduling EventsTips for Scheduling Repeating or Continuous EventsKeep the followin
Chapter 4 Using Basic Applications4.8Basic Applications Overview: Setting AlarmsSetting AlarmsThe Alarm setting lets you set an audible alarm for even
Chapter 4 Using Basic Applications4.9Basic Applications Overview: Setting AlarmsOnce an alarm has sounded, you can tap the Snooze option to dismiss th
Chapter 4 Using Basic Applications4.10Basic Applications Overview: Changing the Date Book ViewChanging the Date Book ViewThe Date Book includes four v
Chapter 4 Using Basic Applications4.11Basic Applications Overview: Changing the Date Book ViewWorking in Week ViewWeek view displays a calendar of you
Chapter 4 Using Basic Applications4.12Basic Applications Overview: Changing the Date Book ViewTips for Using Week ViewKeep the following points in min
Chapter 4 Using Basic Applications4.13Basic Applications Overview: Changing the Date Book ViewWorking in Month ViewThe Month View screen shows which d
Chapter 4 Using Basic Applications4.14Basic Applications Overview: Changing the Date Book DisplayTips for Using Agenda View• Tap any appointment whil
Introduction: Table of ContentsviTable of ContentsLimited Warranty ...
Chapter 4 Using Basic Applications4.15Basic Applications Overview: Changing the Date Book Display3. For Day view, select from the following options:•
Chapter 4 Using Basic Applications4.16Basic Applications Overview: Using the To Do ListUsing the To Do ListThe To Do List is a convenient place to cre
Chapter 4 Using Basic Applications4.17Basic Applications Overview: Using the To Do ListCreating To Do List ItemsA To Do List item is a reminder of a t
Chapter 4 Using Basic Applications4.18Basic Applications Overview: Using the To Do ListSetting To Do List PrioritiesYou can set priorities for tasks i
Chapter 4 Using Basic Applications4.19Basic Applications Overview: Using the To Do ListChanging Priorities and Due DatesYou can change the To Do List
Chapter 4 Using Basic Applications4.20Basic Applications Overview: Using the To Do ListDisplaying Completed and Due ItemsYou can have the To Do List d
Chapter 4 Using Basic Applications4.21Basic Applications Overview: Using the Address BookUsing the Address Book The Address Book lets you keep names,
Chapter 4 Using Basic Applications4.22Basic Applications Overview: Using the Address BookAdding and Using Address Book EntriesThe Address Book applica
Chapter 4 Using Basic Applications4.23Basic Applications Overview: Using the Address BookDuplicating an EntryYou can duplicate existing entries, which
Chapter 4 Using Basic Applications4.24Basic Applications Overview: Using the Address BookEditing Address Book EntriesYou can change the type of inform
Introduction: Table of ContentsviiWriting Numbers ...
Chapter 4 Using Basic Applications4.25Basic Applications Overview: Using the Address BookTo rename custom fields at the end of Address Edit screens:1.
Chapter 4 Using Basic Applications4.26Basic Applications Overview: Using the Memo PadUsing the Memo Pad The Memo Pad provides a place to take notes th
Chapter 4 Using Basic Applications4.27Basic Applications Overview: Using the Memo PadYou can categorize memos and sort them by categories. See “Catego
Chapter 4 Using Basic Applications4.28Basic Applications Overview: Using the CalculatorUsing the CalculatorThe Calculator lets you perform general mat
Chapter 4 Using Basic Applications4.29Basic Applications Overview: Using the CalculatorThe MR button recalls the stored value from memory and inserts
Chapter 5 Performing Common Tasks5.1Performing Common Tasks: Creating and Editing RecordsCHAPTER 5: PERFORMING COMMON TASKSIn this section, the term “
Chapter 5 Performing Common Tasks5.2Performing Common Tasks: Creating and Editing RecordsChoose from the following commands, depending on the applicat
Chapter 5 Performing Common Tasks5.3Performing Common Tasks: Creating and Editing RecordsPurging RecordsOver time, as you use Date Book and the To Do
Chapter 5 Performing Common Tasks5.4Performing Common Tasks: Creating and Editing RecordsTo display a category of records:1. Open one of the followin
Chapter 5 Performing Common Tasks5.5Performing Common Tasks: Creating and Editing Records• In the Address Book, select a record and tap Edit; then ta
Introduction: Table of ContentsviiiWorking in Month View ...
Chapter 5 Performing Common Tasks5.6Performing Common Tasks: Finding RecordsFinding RecordsYour handheld lets you find information in several ways:• I
Chapter 5 Performing Common Tasks5.7Performing Common Tasks: Finding RecordsAs your handheld searches for the text, you can tap Cancel to stop the sea
Chapter 5 Performing Common Tasks5.8Performing Common Tasks: Sorting RecordsSorting RecordsYou can sort lists of records in various ways, depending on
Chapter 5 Performing Common Tasks5.9Performing Common Tasks: Making Records PrivateTo sort the Memo List manually:1. Choose Manually from the Memo Pr
Chapter 5 Performing Common Tasks5.10Performing Common Tasks: Making Records PrivateTo hide private records:1. Do one of the following:• Tap the App
Chapter 5 Performing Common Tasks5.11Performing Common Tasks: Attaching NotesAttaching NotesYou can attach notes to records in all the basic applicati
Chapter 5 Performing Common Tasks5.12Performing Common Tasks: Attaching NotesChoosing FontsYou can change the font style in all basic applications. Yo
Chapter 6 Using the Attention Manager6.1Using the Attention Manager: Insistent AlarmsCHAPTER 6: USING THE ATTENTION MANAGERMany applications (such as
Chapter 6 Using the Attention Manager6.2Using the Attention Manager: Insistent AlarmsSetting Alarm VolumeYou can control most alarm volumes globally i
Chapter 6 Using the Attention Manager6.3Using the Attention Manager: Insistent AlarmsUsing the Reminders List ScreenThe Reminder dialog screen changes
Introduction: Table of ContentsixChapter 6: Using the Attention Manager ... 6.1Insisten
Chapter 6 Using the Attention Manager6.4Using the Attention Manager: Subtle AlarmsSubtle AlarmsSome applications provide a visual and optionally audib
7.1Using an Expansion Card: Displaying Contents of a CardChapter 7 Using an Expansion CardCHAPTER 7: USING AN EXPANSION CARDThe iQue 3600a allows you
7.2Using an Expansion Card: Displaying Contents of a CardChapter 7 Using an Expansion CardTo launch an application on your iQue from a card:1. Tap th
7.3Using an Expansion Card: Displaying Contents of a CardChapter 7 Using an Expansion CardTo copy an application on an expansion card to your handheld
7.4Using an Expansion Card: Displaying Contents of a CardChapter 7 Using an Expansion CardTo beam an application on your card to another Palm Powered™
7.5Using an Expansion Card: Using Card InfoChapter 7 Using an Expansion CardUsing Card InfoThe Card Info Application displays summary information for
7.6Using an Expansion Card: Using Card InfoChapter 7 Using an Expansion Card WARNING: Reformatting and expansion card will destroy its data.6. To di
Chapter 8 Beaming Information8.1Beaming Information: Beaming a RecordCHAPTER 8: BEAMING INFORMATIONYour iQue handheld is equipped with an IR (infrared
Chapter 8 Beaming Information8.2Beaming Information: Beaming an ApplicationBeaming an ApplicationTo beam an application:1. Tap the Home icon . Then
9.1HotSync® Operations: Performing a HotSync Operation for the First TimeChapter 9 Using HotSync® OperationsCHAPTER 9: EXCHANGING AND UPDATING DATA US
Related products and manuals for Air equipment Garmin iQue 3600a
 (116 pages)
(88 pages)
(192 pages)
(98 pages)
(114 pages)
(68 pages)
(116 pages)
(88 pages)
(192 pages)
(98 pages)
(114 pages)
(68 pages)
 (179 pages)
© 2020, manymanuals.com. All rights reserved. | 4.792 s |
 Manymanuals.com
 Manymanuals.de
 Manymanuals.fr
 Manymanuals.it
 Manymanuals.pl
 Manymanuals.cz
 Manymanuals.es
 Manymanuals-pt.com
Comments to this Manuals